|
My ongoing research on the Corsairs began in 1984. That's when I joined a
local "I.P.M.S./U.S.A. model club. I wanted to build one of the
F2G Racing Corsairs, so I ask club members where I can buy the kit. I was
told that there were none available, and that you had to convert a F4U-1A
kit to the F2G. Hey!!! I'm new at this. I'm a "out-of-the-box" builder, what's this conversion stuff??
(click on the thumbnails below to view the full size
images)
 |
|
1/32 and
1/72 models |
 |
 |
 |
 |
| photo
of real plane after crash |
1/32
scale model of crashed plane |
true
color |
1/32
scale #57 photo appears on Aviation USK box |
Well, I
soon learned, and by 1987, my 1/32 scale F2G-1D Race #57 was finished. It
took first place at the 1987 I.PM.S./U.S.A. National Contest in Washington D.C.
A "NOVICE" builder!! why a complicated F2G????
At about the same time in 1984, I was surfing the pages of FineScale
Modelers magazine. An ad was placed by Jim Butler, who was affiliated with
"THE SOCIETY of AIR RACING HISTORIANS." located in Cleveland, Ohio.
Jim put me onto Ron Eminger of Cleveland, who had built #57 in 1/32 scale.
Between Ron & Jim I received lots of information on the F2G's, including
some rare color photo's of #57.
In 1987, Jim gave me Harry Doan's address in Florida. Harry owned # 57,
and
had planned to rebuild the aircraft. On March 29, 1987, I recorded a
telephone conversation I had with Harry, and one with Cook Cleland, the
original owner of #57. More good information.
For years, Jim tried to find the B.U. No. for #57. Harry and Cook said it
was #88458.
 |
|
Folding
wings |
They also clarified that all the racing Corsairs had hydraulic folding
wings, and they were converted from the F4U-4/FG-4 airframe.
 |
 |
 |
| correct
engine |
incorrect
engine |
photo
of exhausts |
All F2G
racers
had the P. & W. R-4360-2/4, 28-cylinder engine. There were 7-cylinders
in
each bank. There were four banks. There were 7-magnetos in front of the
first row of cylinders. On each side of the a./c. there were
4-exhaust
stacks, and 6-exhaust stacks on the underside of the 3-cowl flaps.
To date, I've built 2-1/32 scale F2G's, and two 1/72 scale F2G's. I used
the 1/32 Revelle F4U-1A kits. For the second two models, I used the
"Aviation-Usk" kits. Like any kit, they all have there good and
bad points. It would take maybe 30-pages of written information on my 1/32 scale models,
so I'll forget that, and show a few photos.
 |
 |
| Aviation
USK kit |
Aviation
USK kit decals |
For my 1/72 scale models. The kits have a good outline on the fuselage for
the F2G.
 |
 |
| modified
tail hook opening |
modified
tail wheel extension |
The tail hook opening had to be closed up.
 |
| modified
rear deck |
A rear deck had
to be
cut in, aft of the cockpit. A 23" long canopy tip has to be installed
onto
the top of the fuselage spine, aft of the rear deck opening.
 |
 |
| Canopy
mold |
mold
and canopies |
A new
canopy
mold must be made, as they used a canopy from the P-47. The P-47 canopy
came from the Hawker Typhoon. This style of canopy was used on two
cut-down
F4U-1A Corsairs; (B.U. No's. 14091 & 14092). They were
"NEVER" used on the
production F2G'S. A entirely "NEW" canopy was designed and used.
I had to revised the "auto-bondo" mold a few times, so the canopy
would fit, that's why some of the canopy frame lines were sanded off.
I also coated the mold with super-glue, then sanded it smooth with #2000 wet/dry
sandpaper. If, you do not get any dust particles on the mold, you need not
sand the inside of the canopy, just dip it into Future. Once dried, mask
and paint on canopy frame lines on the inside/outside, then re-dip in future a
few times.

|
 |
 |
| real
exhausts |
kit
cowl flaps |
exhaust
opening |
Exhaust
ports on the underside has to be cut-in for the 6-exhaust stacks. The main
wheel wells must be closed in.
|
 |
| real
intake openings |
kit's
modified openings |
The wing air inlets are different on the
F2G's, so they must be changed. Note, the inlets on #57 are factory, while
the ones on #74 are revised by Cook Cleland.
 |
 |
 |
 |
| kit
seat before |
kit
seat after |
instrument
panels |
instrument
panel installed |
The cockpit is fair, but you
need to add armor plate and roll bars to #57; (this was on all F2G's).
They
removed some of the bars in some of the racers.
 |
| Kit
engine |
The kit engine has
a
9-cylinder arrangement, which can be changed. The kit prop is correct @
14' dia.
 |
| beautiful
resin air-scoops |
The two extra cast resin air-scoops are excellent.
The decals
are fine, except the SOHIO logo. They have it in Red/White/Black. It was
Red &
White only.
 |
| more
decals |
I used "Microscale"
decal sheet #87-420 1930's
& 40's
Commercial Signs. They have three sizes, and they match close enough to
1/32; 1/48; & 1/72.
 |
 |
 |
 |
 |
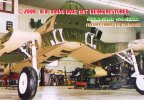
| scratch
built and dramatically improved main gear wheel wells (ARC Editor) |
 |
 |
 |
 |
| 1/72
scale F2G
SUPER CORSAIR Racer #57 |
|
A pair of
racing beauties (ARC Editor) |
With a few shortcomings, the final outcome is really worth the time spent on
the models; (estimate 150-175 hours on each model.)
Happy modeling: Rodney Williams
P.S. Check out some of my other models on >> www.skywriters.net
<<<
|